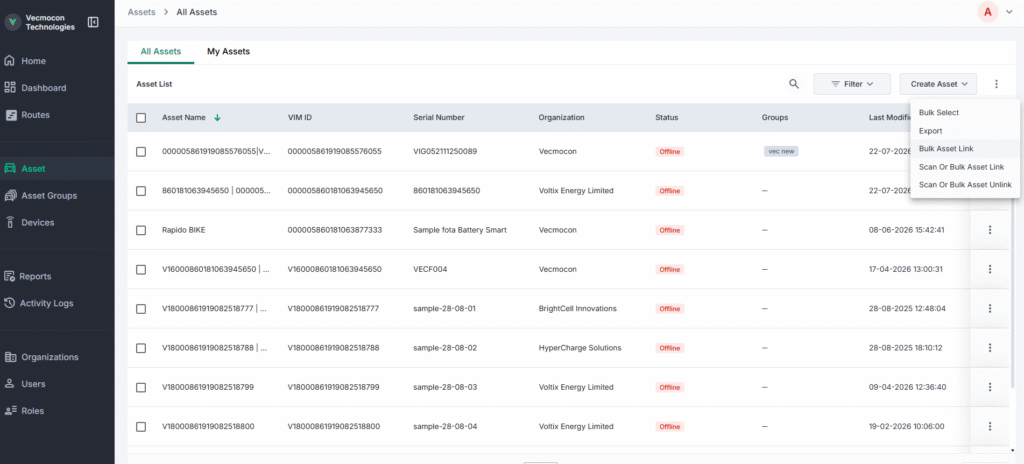
Log in to the Vec-TR and navigate to Asset > All Assets (or My Assets) from the left menu bar.
Click the three-dots menu icon located at the top-right corner near the Create Asset button.
Select Bulk Asset Link from the dropdown options.
Step 2: Choose Identification Type
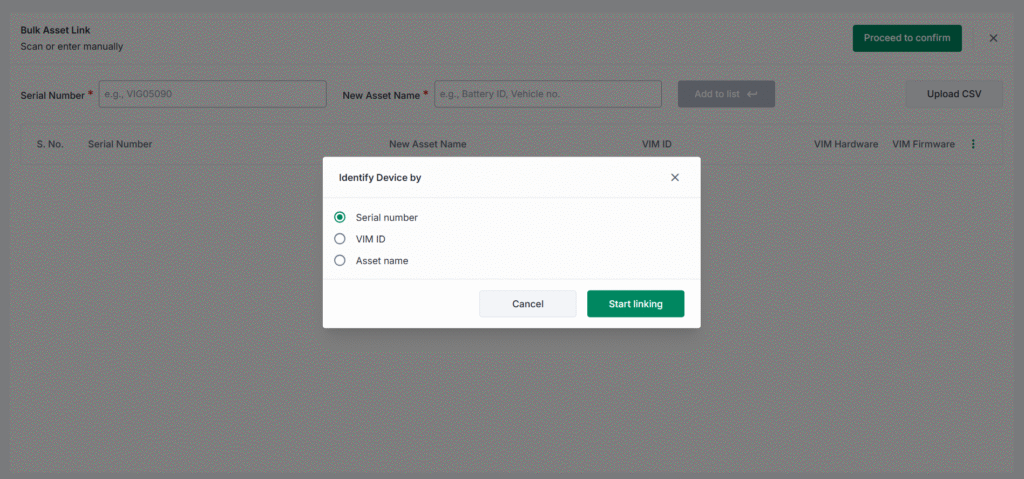
A pop-up titled Identify Device by will appear.
Select Serial number to identify your IoT devices by their serial number.
Click Start linking.
Step 3: Add Assets (Choose Method A or B)
Option A: Manual Entry
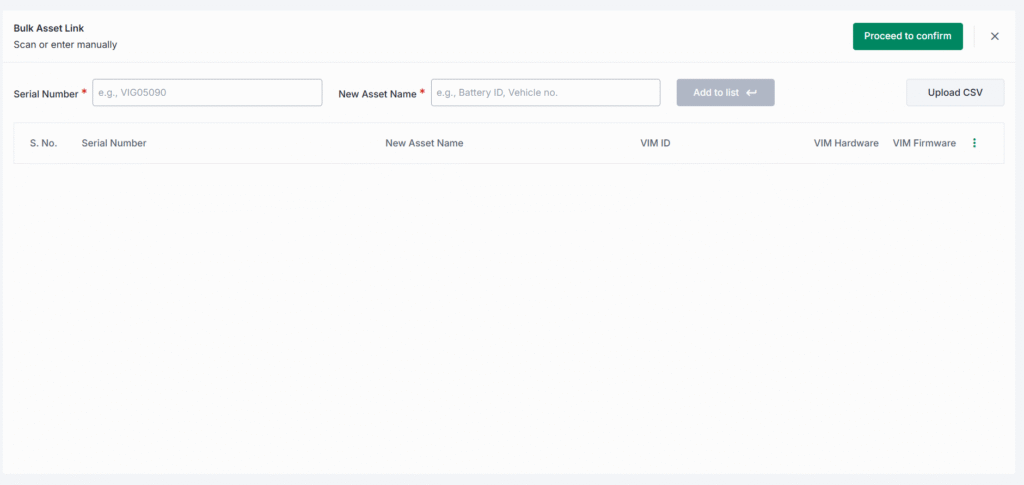
In the input fields at the top:
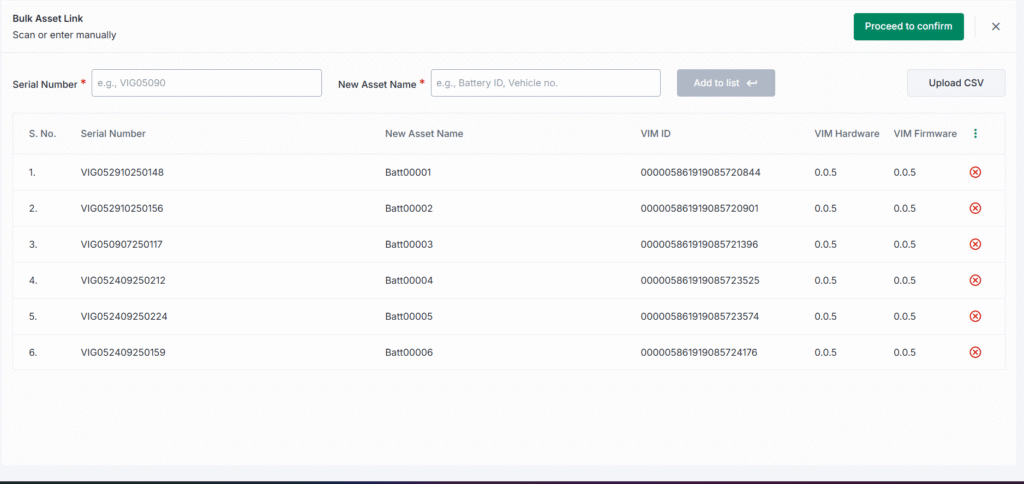
Serial Number: Enter the IoT device’s serial number (e.g., VIG05090).
New Asset Name: Enter the target asset name (e.g., Battery Serial Number or Vehicle Number).
Click Add to list.
Repeat for additional devices, then proceed to Step 4.
Option B: Bulk CSV Upload (Recommended)
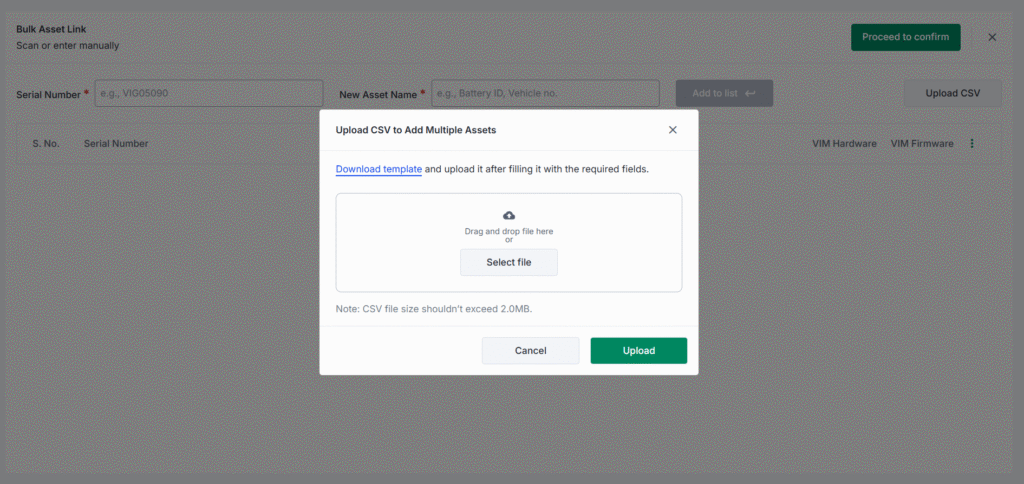
On the Bulk Asset Link screen, click the Upload CSV button on the right side.
In the modal that appears, click Download template.
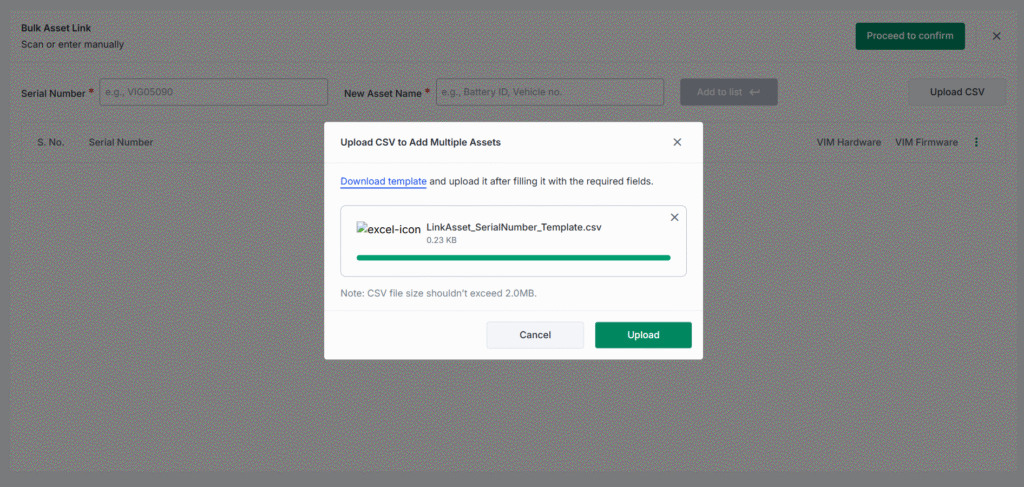
Open the downloaded Excel file (LinkAsset_SerialNumber_Template.csv).
Fill in the columns:
S. no.: Row index (1, 2, 3…)
Serial Number: The IoT serial number (e.g., VIG000000001)
Asset Name: The name you want to assign (e.g., Battery Serial Number like Batt00001)
Save the file in CSV format (ensure the file size is under 2.0MB).
Return to the platform, click Select file (or drag and drop the CSV into the box), and click Upload.
Step 4: Validate and Review Assets
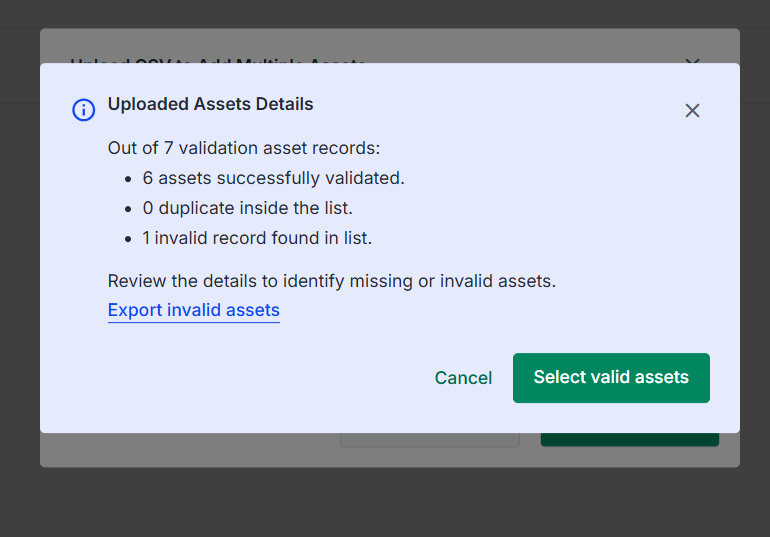
Once uploaded, an Uploaded Assets Details summary modal will display showing:
Validated assets count
Duplicate records (if any)
Invalid records (if any)
(Optional) Click Export invalid assets to inspect any rejected rows.
Click Select valid assets to import the valid entries into your staging list.
Step 5: Confirm and Group Assets
Review the generated table showing your Serial Numbers, New Asset Names, and corresponding VIM IDs.
Click the green Proceed to confirm button at the top right.
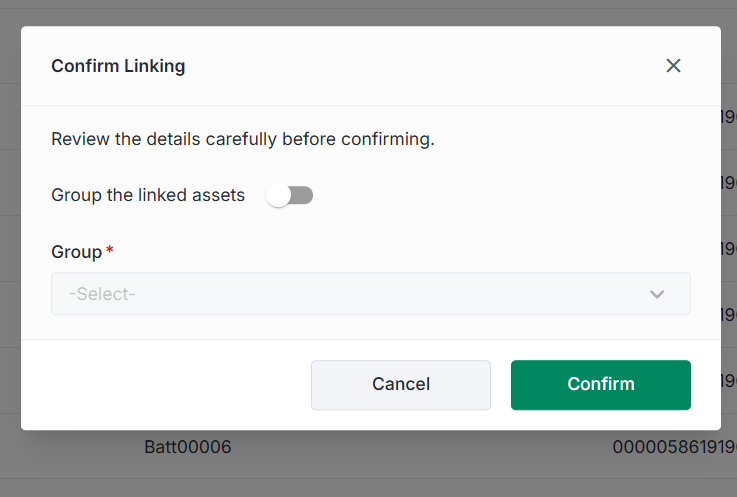
A Confirm Linking pop-up window will appear.
(Optional) Toggle Group the linked assets to ON and select a target group from the Group dropdown if you wish to assign these devices to a specific asset group immediately.